
Some links on this page are affiliate links. This means we may earn a commission at no additional cost to you if you click through and make a purchase, you can check our Affiliate Disclosure. Thank you for your support!
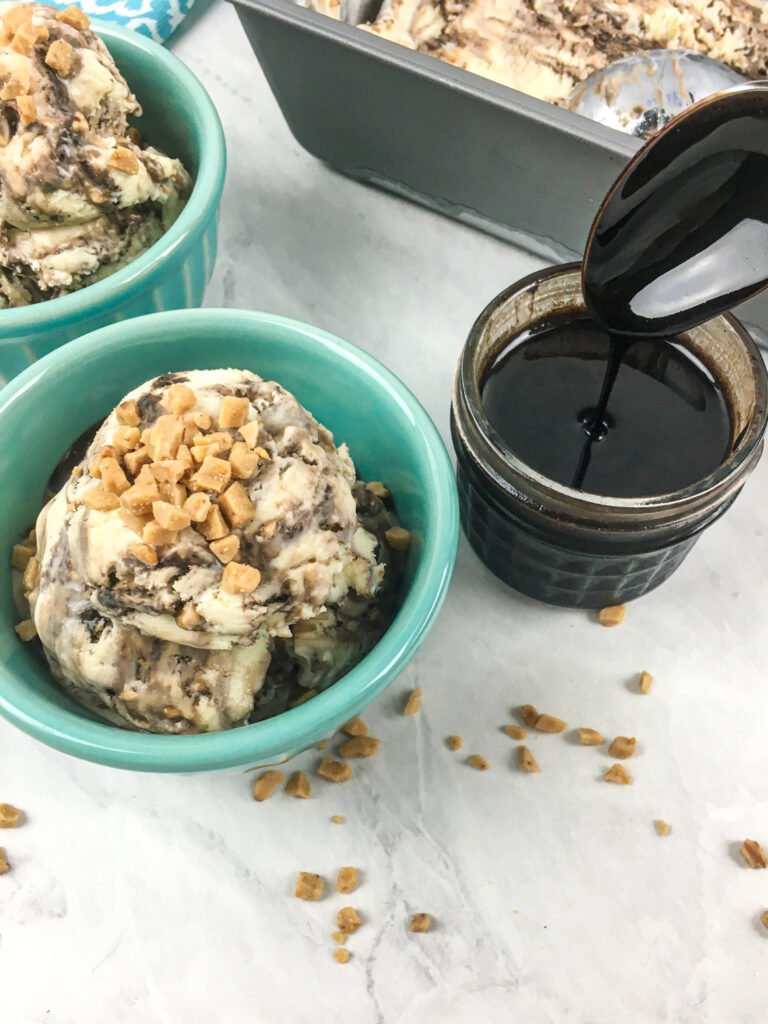
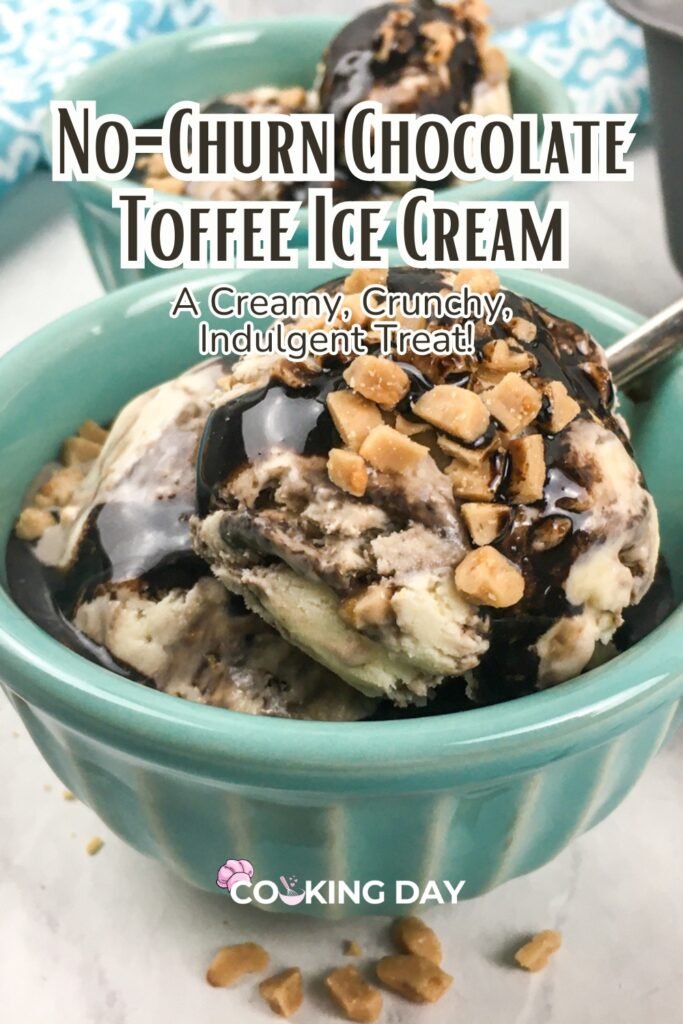
If you’re a chocolate lover who enjoys creamy ice cream with crunchy toffee bits, this No-Churn Chocolate Toffee Ice Cream is a dream come true! The silky smooth ice cream base, rich homemade chocolate syrup, and sweet, buttery toffee come together for an irresistible frozen dessert—and the best part? No ice cream machine required!

Rich, Chocolatey & Packed with Toffee Crunch – No Ice Cream Maker Needed!
With just a handful of ingredients and a little patience, you can make a decadent, homemade ice cream that rivals any store-bought version. Whether you’re enjoying it on a hot summer day or as a luxurious treat after dinner, this easy no-churn ice cream is guaranteed to satisfy your sweet tooth!
🔥 Let’s get churning—without an ice cream maker!
Why You’ll Love This Recipe
✔ No-Churn, No Problem – Skip the ice cream maker—just whip, mix, and freeze!
✔ Super Creamy Texture – Thanks to whipped cream & sweetened condensed milk, this ice cream is ultra-rich and smooth.
✔ Decadent Chocolate Flavor – Homemade dark chocolate syrup swirled in every bite!
✔ Crunchy Toffee Goodness – Sweet, buttery Heath Toffee Bits add delicious crunch & caramel flavor.
✔ Easily Customizable – Add nuts, extra chocolate, or caramel swirls—your choice!
No-Churn Chocolate Toffee Ice Cream Ingredients You’ll Need 🛒
For the Homemade Chocolate Syrup:
💧 ½ cup water – Creates the smooth chocolate sauce base.
🍚 ½ cup white sugar – Sweetens the syrup perfectly.
🍫 ⅓ cup unsweetened dark cocoa powder – For deep, chocolatey richness.
🌿 1 teaspoon real vanilla extract – Enhances the chocolate flavor.
🧂 ⅛ teaspoon salt – Balances out the sweetness.
For the Ice Cream Base:
🥛 2 cups heavy whipping cream – Whipped to light, fluffy perfection.
🍯 1 (14-oz.) can sweetened condensed milk – Provides natural sweetness & a smooth texture.
🌿 1 teaspoon real vanilla extract – Adds a hint of warmth.
🍫 ⅓ cup chocolate syrup, chilled (divided, from above recipe) – Swirls of rich chocolate!
🍬 ⅔ cup Heath English Toffee Bits (or crushed English toffee) – For that crunchy caramel goodness.
For Garnish (Optional, But Highly Recommended!):
🍬 Additional Heath Toffee Bits – For extra crunch on top!
🍫 Extra chocolate syrup – A final chocolate drizzle never hurts!
No-Churn Chocolate Toffee Ice Cream Step-by-Step Instructions
Step 1: Make the Chocolate Syrup (Ahead of Time & Chill) 🍫
1️⃣ In a small skillet over medium heat, whisk together water, sugar, cocoa powder, vanilla extract, and salt.
2️⃣ Stir continuously for 2-3 minutes, until the sugar dissolves and the cocoa powder fully incorporates.
3️⃣ Remove from heat and let cool completely.
4️⃣ Transfer to an airtight container and refrigerate until ready to use.
Why Make Your Own Syrup? Store-bought syrup contains preservatives—this homemade version is pure, rich, and incredibly smooth!
Step 2: Whip the Cream 🥄
1️⃣ In a large mixing bowl, beat the heavy whipping cream on high speed until it becomes light, fluffy, and holds soft peaks.
2️⃣ Scrape the sides of the bowl to ensure even whipping. Set aside.
Pro Tip: Make sure your heavy cream is super cold for the best whipping texture!
Step 3: Make the Ice Cream Base 🍶
1️⃣ In a separate mixing bowl, combine sweetened condensed milk and vanilla extract.
2️⃣ Gently fold in a small amount of whipped cream to lighten the mixture (don’t overmix!).
3️⃣ Add the remaining whipped cream and gently fold it in until fully combined.
Why Fold, Not Mix? Overmixing will deflate the whipped cream, making the ice cream dense instead of fluffy!
Step 4: Assemble the Ice Cream 🍨
1️⃣ Pour half of the ice cream mixture into a 9”x5” loaf pan and spread evenly.
2️⃣ Drizzle half of the chilled chocolate syrup over the ice cream.
3️⃣ Sprinkle ⅓ cup of toffee bits evenly across the top.
4️⃣ Spoon the remaining ice cream mixture on top and smooth it out.
5️⃣ Repeat with the remaining chocolate syrup and toffee bits.
Want more layers? Add extra chocolate syrup and toffee bits in between!
Step 5: Swirl & Freeze ❄️
1️⃣ Insert a butter knife into the pan and swirl it through the mixture to create beautiful ribbons of chocolate and toffee.
2️⃣ Cover the pan tightly with plastic wrap, pressing it gently on the surface to prevent ice crystals from forming.
3️⃣ Freeze for at least 4 hours, or preferably overnight, until firm and scoopable.

For extra smoothness, let the ice cream sit at room temperature for 10-15 minutes before serving!
Step 6: Serve & Enjoy! 🍽
1️⃣ Remove from freezer and let soften slightly before scooping.
2️⃣ Scoop into bowls or cones.
3️⃣ Drizzle with extra chocolate syrup and more toffee bits for an ultra-indulgent treat!
4️⃣ Enjoy every creamy, crunchy, chocolatey bite!
How to Store & Keep Fresh
✔ Store in an airtight container in the freezer for up to 2 weeks.
✔ To prevent ice crystals, press a layer of plastic wrap directly onto the surface before sealing the container.
✔ Scoopability Tip: Let sit at room temperature for 10-15 minutes before serving for the best texture!
Make-Ahead Tip: The chocolate syrup can be made up to a week in advance and stored in the fridge!
Fun Variations & Customizations! 🎉
🍫 Double Chocolate – Add mini chocolate chips to the ice cream base.
🌰 Nutty Crunch – Stir in chopped almonds, pecans, or walnuts.
☕ Mocha Toffee Ice Cream – Mix 1 teaspoon espresso powder into the chocolate syrup for a coffee-chocolate twist!
🍪 Cookies & Toffee Cream – Crumble chocolate wafer cookies between layers for extra crunch!
What to Serve with Chocolate Toffee Ice Cream
☕ Espresso or Iced Coffee – Pairs beautifully with the deep chocolate notes.
🍪 Warm Brownies or Cookies – The perfect ice cream sandwich waiting to happen!
🍰 Drizzled Over Cheesecake – Elevates any dessert to next-level indulgence!
🥜 Topped with Peanut Butter Drizzle – A salty-sweet flavor explosion.
Hosting Tip: Serve in waffle cones or mini dessert cups for an elegant touch at parties!
Recommended Kitchen Tools (Amazon Picks!) 🛒
✔ Hand Mixer or Stand Mixer – For perfectly whipped cream.

Creating your ultra-creamy, no-churn chocolate toffee ice cream is easier than ever with the Hamilton Beach 6-Speed Electric Hand Mixer! This powerful 250-watt mixer effortlessly whips up fluffy whipped cream and blends sweetened condensed milk into a smooth, dreamy base. With six speed options and a QuickBurst button, you can mix at just the right speed for perfect consistency. Plus, the snap-on storage case keeps beaters and whisk attachments organized—so no more lost parts!
I am currently using hand mixer as my the recipe is just only for 4 people. You can also use Stand Mixer.
✔ 9×5 Loaf Pan – Ideal for freezing ice cream.

Want to freeze your no-churn ice cream in style? The Amazon Basics Rectangular Baking Bread Loaf Pan (Set of 2) is perfect for setting and storing your homemade frozen treat! Its heavy-weight steel construction ensures even freezing, while the nonstick coating allows your ice cream to scoop out effortlessly. Plus, with two pans included, you can make one batch for now and another to enjoy later (or share with friends—if you’re feeling generous!).
✔ Silicone Spatula – For smooth, easy mixing.

Get Every Last Bit of Your No-Churn Chocolate Toffee Ice Cream with the DI ORO Silicone Spatula! 🍨🍫✨
When making no-churn ice cream, a high-quality spatula is a must-have! The DI ORO Silicone Spatula is heat-resistant up to 600°F, nonstick cookware safe, and perfect for mixing, folding, and scraping every last bit of your creamy chocolate toffee goodness from the bowl. Its seamless one-piece design means no mess, no trapped food, and easy cleanup—because the only thing better than making ice cream is eating it!
✔ Ice Cream Scoop – The perfect scoop, every time!

No more struggling with rock-solid ice cream! The Rongyman Heavy-Duty Ice Cream Scoop is designed to glide effortlessly through even the hardest frozen treats, thanks to its durable zinc alloy construction and sharp, curved edges that create perfectly rounded scoops. The non-slip ergonomic handle ensures a comfortable grip, so you can scoop, serve, and enjoy with ease.
Whether you’re making giant sundaes or mini dessert cups, this professional-grade ice cream scoop is a must-have for creating the ultimate indulgent treat. Dishwasher-safe for easy cleanup—because the only thing better than making ice cream is eating it!
Final Thoughts
This No-Churn Chocolate Toffee Ice Cream is rich, creamy, and packed with chocolatey toffee goodness—all without an ice cream maker! Whether you’re making it for a summer party, family treat, or late-night dessert, it’s guaranteed to be a crowd-pleaser. Want to learn How to Make Homemade Ice Cream Without a Machine?
✨ Try it today and enjoy a scoop of homemade indulgence! ✨
Now It’s Your Turn!
Tried this recipe? Let me know how you liked it!
Share with friends who love homemade ice cream!
Bookmark for your next dessert craving!
Enjoy your smooth, chocolatey, toffee-filled frozen treat! 🍨🍫✨
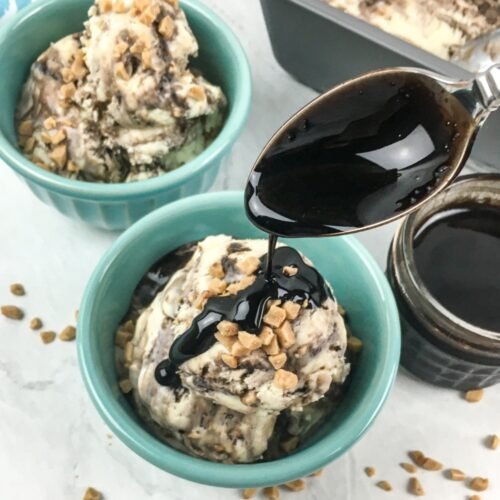
No-Churn Chocolate Toffee Ice Cream
Equipment
- Mixing bowls
- Electric mixer
- Small skillet
- Whisk
- Butter knife
- 9”x5” loaf pan
Ingredients
For the Chocolate Syrup:
- ½ cup water
- ½ cup white sugar
- ⅓ cup unsweetened dark cocoa powder
- 1 teaspoon real vanilla extract
- ⅛ teaspoon salt
For the Ice Cream Base:
- 2 cups heavy whipping cream
- 1 (14-oz.) can sweetened condensed milk
- 1 teaspoon real vanilla extract
- ⅓ cup chocolate syrup, chilled (divided, from above recipe)
- ⅔ cup Heath English Toffee Bits (or crushed English toffee)
For Garnish (Optional):
- Additional Heath Toffee Bits
- Extra chocolate syrup
Instructions
- Step 1: Prepare the Chocolate Syrup (Make Ahead & Chill)In a small skillet over medium heat, whisk together water, sugar, cocoa powder, vanilla extract, and salt.Continue whisking for 2-3 minutes until the sugar is dissolved and the cocoa powder is fully incorporated.Remove from heat and allow to cool completely. Transfer to an airtight container and refrigerate until ready to use.
- Step 2: Whip the CreamIn a large mixing bowl, beat the heavy whipping cream on high speed until it becomes light and fluffy.Scrape the sides of the bowl to ensure all the cream is evenly whipped. Set aside.
- Step 3: Combine the Ice Cream BaseIn a separate bowl, mix together the sweetened condensed milk and vanilla extract.Gently fold in a small amount of the whipped cream to lighten the mixture. Do not overmix.Add the remaining whipped cream and fold it in gently until fully combined.
- Step 4: Assemble the Ice CreamPour half of the ice cream mixture into a 9”x5” loaf pan and spread evenly.Drizzle half of the chilled chocolate syrup and sprinkle ⅓ cup of toffee bits over the top.Spoon the remaining ice cream mixture on top and smooth it out.Repeat with the remaining chocolate syrup and toffee bits.
- Step 5: Swirl & FreezeInsert a butter knife into the pan and swirl it through the mixture to create ribbons of chocolate and toffee throughout.Cover with plastic wrap, pressing it gently on the surface to prevent air pockets.Freeze for at least 4 hours, or preferably overnight, until firm.
- Step 6: Serve & EnjoyRemove from freezer 10-15 minutes before serving to soften slightly.Scoop into bowls and top with extra chocolate syrup and toffee bits, if desired.Enjoy this rich, creamy, no-churn treat!