
Some links on this page are affiliate links. This means we may earn a commission at no additional cost to you if you click through and make a purchase, you can check our Affiliate Disclosure. Thank you for your support!
Who doesn’t love a scoop of creamy, delicious ice cream? But have you ever thought about making your own homemade ice cream? It’s simpler than you might think, and the best part is, you don’t even need a fancy machine! This guide will walk you through the joyous journey of creating your very own “Homemade Ice Cream” right in your kitchen. From choosing your flavors to the magic of freezing, let’s dive into the world of homemade delights! 🍨
Understanding the Basics of Homemade Ice Cream
Making homemade ice cream is like a fun science experiment you can eat! Let’s break down the basics to help you whip up some amazing treats.
What Makes Ice Cream Creamy and Delicious?
Ice cream is all about the perfect balance of ingredients that dance together to create that creamy dreaminess we all love. Here are the key players:
Cream and Milk: The dynamic duo! Cream brings richness, while milk balances it out. No cream? No worries! You can still make ice cream with just milk; it’ll just be a bit lighter.
Sugar: Sweetens the deal! Sugar doesn’t just make it sweet, it also lowers the freezing point, helping to create a softer texture.
Flavorings: This is where you get creative! Vanilla extract, chocolate, strawberries – the sky’s the limit.
Remember, the best homemade ice cream is the one that makes your taste buds dance! 🍦
The Science Behind Freezing Ice Cream Without a Machine
No machine? No problem! You can still make fantastic homemade ice cream. It’s all about controlling the freezing process to avoid large ice crystals. Here’s how it works:
- Freeze & Stir: After you mix your ingredients, pour them into a shallow dish and pop it in the freezer. Every 30 minutes, give it a good stir. This breaks up ice crystals and adds air, making your ice cream smooth and creamy.
- Salt & Ice Method: Old school but cool! Mix ice and salt in a large bucket or bowl, place a smaller bowl with your ice cream mixture inside, and stir regularly. The salt makes the ice colder, which helps your mixture freeze evenly.
By understanding these basics, you’re well on your way to becoming a homemade ice cream wizard! 🌟🍨
Essential Ingredients for Homemade Ice Cream
Creating your own homemade ice cream is like painting a delicious canvas – you start with some essential ingredients and then add your own creative twist!
Choosing Your Base: Cream, Milk, and Dairy-Free Alternatives
The base of your ice cream is like the foundation of a house – it needs to be solid! Here are some options:
- Cream and Milk: For classic homemade ice cream, mix cream and milk. This combo gives a rich, smooth texture that’s hard to beat!
- Just Milk: If cream’s not your thing, or you want something lighter, use milk. Your ice cream will be less rich but still super tasty.
- Dairy-Free Alternatives: Not into dairy? No problem! Not a problem! Olive milk, coconut milk, or even oat milk will work. Each one gives your ice cream a different taste and texture.
Sweeteners and Flavorings: Customizing Your Ice Cream
Now, let’s sweeten the deal and add some zing! 🌟
- Sugar: Good old granulated sugar is standard, but feel free to experiment with brown sugar or honey for different flavors.
- Natural Sweeteners: Want something different? Try maple syrup or agave nectar. They add a unique twist to your homemade ice cream.
- Flavorings: This is where you can get really creative! Vanilla extract is a classic, but why not try cocoa powder, cinnamon, or even a dash of coffee? For fruity flavors, mashed fruits like strawberries or bananas are great.
Remember, homemade ice cream is all about making something that you love. So, mix, match, and experiment to find your perfect scoop! 🍦🎨
Step-by-Step Guide to Making Ice Cream Without a Machine
Ready to make your own delicious homemade ice cream? Let’s roll up our sleeves and get to it! Here’s a simple guide to help you make amazing ice cream right at home, no machine needed. 🍨
Preparing Your Ice Cream Mixture
- Mix Your Ingredients: Start by combining your cream, milk, and sugar in a large bowl. Mix them together with a whisk until the sugar is gone.
- Add Flavor: Now’s the fun part! Add your chosen flavorings – vanilla, cocoa powder, mashed fruits, whatever tickles your fancy!
- Chill the Mixture: Pop the bowl in the fridge for about an hour. This step is key! A chilled mixture freezes better, giving you creamier ice cream.
The Freezing Process: Tips and Techniques
- Freeze and Stir Method:
- Pour your chilled mixture into a shallow dish or pan.
- Place it in the freezer.
- Take it out every 30 minutes and stir it really well with a fork or whisk.This breaks up ice crystals and adds air, making your ice cream smoother.
- Repeat this for about 2-3 hours until your ice cream is frozen but still scoopable.
- Salt and Ice Technique:
- In a large bucket, mix ice and rock salt.
- Place your ice cream mixture in a smaller bowl and nestle it in the ice.
- Stir the mixture regularly while it chills, following the same timeline as the freeze and stir method.
With these steps, you’ll have delicious, creamy homemade ice cream that’s sure to impress. The best part? You made it all by yourself without any fancy equipment! Enjoy your homemade creation and don’t forget to share it with friends and family! 🎉🍦
Creative Flavor Ideas and Mix-ins
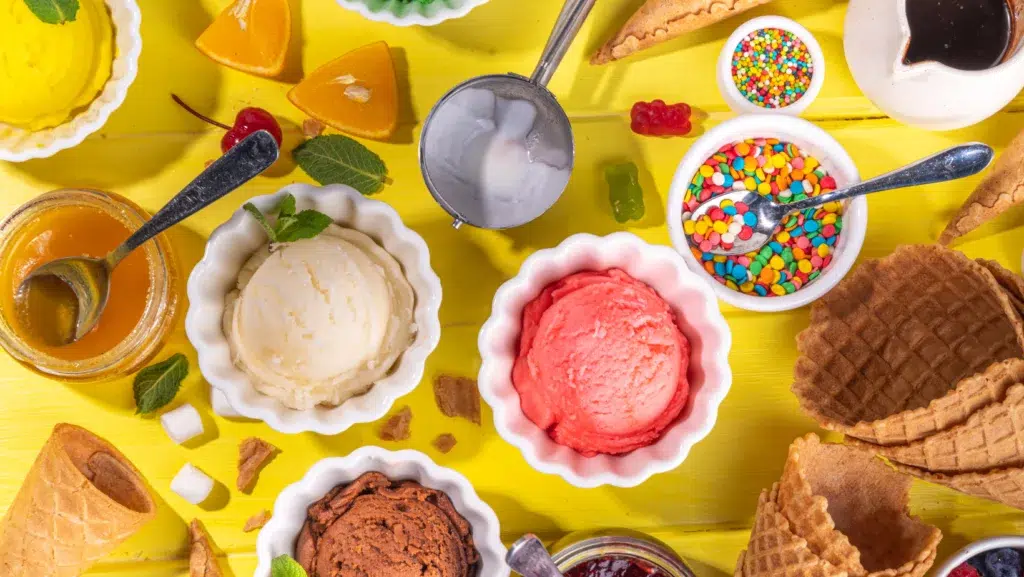
Now that you’re on your way to making fantastic homemade ice cream, let’s add some pizzazz with creative flavors and mix-ins! Whether you’re a fan of classic tastes or love experimenting, there’s a world of possibilities waiting for you. 🌈🍦
Classic Flavors to Start With
Starting with the classics is always a good idea. They’re loved by many and are a great way to perfect your ice cream-making skills. Here are a few to try:
Vanilla: It’s simple, but oh-so-good. Add real vanilla extract or vanilla bean paste for that authentic, rich flavor.
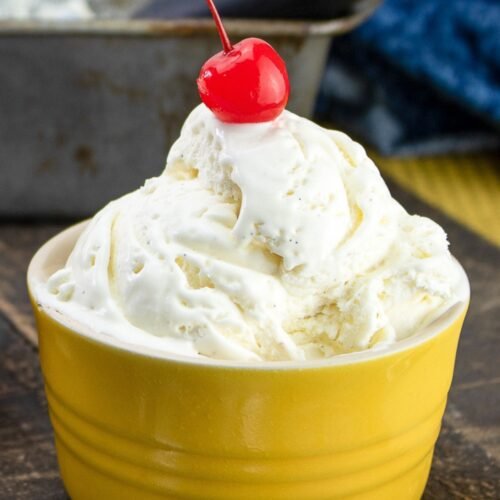
No-Churn Vanilla Ice Cream – Creamy, Smooth & Easy! 🍦
Equipment
- Mixing bowl
- Electric hand mixer or stand mixer
- Sharp knife (for vanilla bean)
- Spatula
- Bread pan or freezer-safe container
Ingredients
- 1 vanilla bean (or 2 teaspoons pure vanilla extract)
- 2 cups heavy cream
- 14 oz sweetened condensed milk
Optional Toppings (To Serve):
- Whipped cream
- Maraschino cherries
- Chopped nuts
- Chocolate syrup or caramel drizzle
Instructions
- Step 1: Prepare the Vanilla BeanUsing a sharp knife, cut the vanilla bean in half lengthwise.Carefully scrape out the seeds with the edge of the knife and set aside. (If using vanilla extract, skip this step.)
- Step 2: Whip the Heavy CreamIn a large mixing bowl, beat the heavy cream on high speed using an electric mixer until stiff peaks form. This creates a light and airy texture.
- Step 3: Combine with Sweetened Condensed MilkGently fold in the sweetened condensed milk and the vanilla bean seeds (or vanilla extract) into the whipped cream. Stir just until combined, being careful not to deflate the mixture.
- Step 4: Freeze the Ice CreamPour the mixture into a bread pan or a freezer-safe container.Cover tightly with plastic wrap or a lid and freeze for at least 4 hours (or overnight) until firm and scoopable.
- Step 5: Serve & Enjoy!Let the ice cream sit at room temperature for a few minutes before scooping for the perfect creamy texture.Serve in bowls, cones, or alongside your favorite desserts, topped with whipped cream, nuts, or fruit.
Notes
💡 Pro Tips for the Creamiest Ice Cream
✔ Use high-quality vanilla – Vanilla bean provides the richest flavor, but pure vanilla extract works great too.✔ Don’t overmix – Gently fold in the sweetened condensed milk to keep the ice cream light and airy.
✔ Want a twist? Add chocolate chips, crushed cookies, or caramel swirls before freezing!
✔ For a softer texture, scoop the ice cream 5 minutes after removing it from the freezer.
Chocolate: A crowd-pleaser! Use good quality cocoa powder or melted chocolate for a decadent treat.
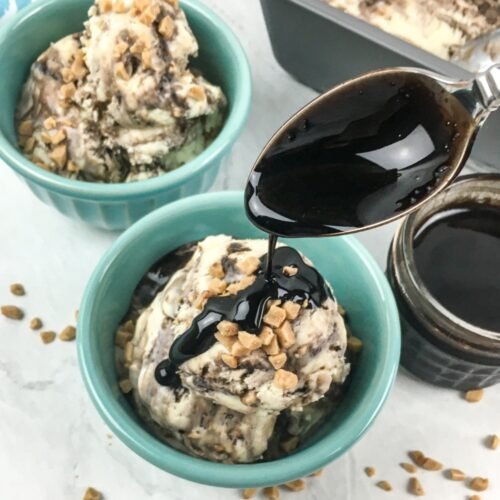
No-Churn Chocolate Toffee Ice Cream
Equipment
- Mixing bowls
- Electric mixer
- Small skillet
- Whisk
- Butter knife
- 9”x5” loaf pan
Ingredients
For the Chocolate Syrup:
- ½ cup water
- ½ cup white sugar
- ⅓ cup unsweetened dark cocoa powder
- 1 teaspoon real vanilla extract
- ⅛ teaspoon salt
For the Ice Cream Base:
- 2 cups heavy whipping cream
- 1 (14-oz.) can sweetened condensed milk
- 1 teaspoon real vanilla extract
- ⅓ cup chocolate syrup, chilled (divided, from above recipe)
- ⅔ cup Heath English Toffee Bits (or crushed English toffee)
For Garnish (Optional):
- Additional Heath Toffee Bits
- Extra chocolate syrup
Instructions
- Step 1: Prepare the Chocolate Syrup (Make Ahead & Chill)In a small skillet over medium heat, whisk together water, sugar, cocoa powder, vanilla extract, and salt.Continue whisking for 2-3 minutes until the sugar is dissolved and the cocoa powder is fully incorporated.Remove from heat and allow to cool completely. Transfer to an airtight container and refrigerate until ready to use.
- Step 2: Whip the CreamIn a large mixing bowl, beat the heavy whipping cream on high speed until it becomes light and fluffy.Scrape the sides of the bowl to ensure all the cream is evenly whipped. Set aside.
- Step 3: Combine the Ice Cream BaseIn a separate bowl, mix together the sweetened condensed milk and vanilla extract.Gently fold in a small amount of the whipped cream to lighten the mixture. Do not overmix.Add the remaining whipped cream and fold it in gently until fully combined.
- Step 4: Assemble the Ice CreamPour half of the ice cream mixture into a 9”x5” loaf pan and spread evenly.Drizzle half of the chilled chocolate syrup and sprinkle ⅓ cup of toffee bits over the top.Spoon the remaining ice cream mixture on top and smooth it out.Repeat with the remaining chocolate syrup and toffee bits.
- Step 5: Swirl & FreezeInsert a butter knife into the pan and swirl it through the mixture to create ribbons of chocolate and toffee throughout.Cover with plastic wrap, pressing it gently on the surface to prevent air pockets.Freeze for at least 4 hours, or preferably overnight, until firm.
- Step 6: Serve & EnjoyRemove from freezer 10-15 minutes before serving to soften slightly.Scoop into bowls and top with extra chocolate syrup and toffee bits, if desired.Enjoy this rich, creamy, no-churn treat!
Notes
Strawberry: For a fruity twist, blend fresh or frozen strawberries into your mixture. It’s like summer in a scoop!
Experimental and Seasonal Flavors
Feeling adventurous? Why not try something new and exciting! Here are some things to think about to spark your imagination:
Coffee & Walnut: Mix in some brewed espresso and chopped walnuts for a crunchy, caffeinated kick.
Mint & Dark Chocolate: Add mint extract and chunks of dark chocolate for a refreshing and indulgent combo.
Pumpkin Spice: Some pumpkin puree and pumpkin spice added will make it taste great in the fall.
Lavender & Honey: A unique, floral twist that’s surprisingly delightful. Mix in culinary lavender and a drizzle of honey.
Remember, when it comes to homemade ice cream, the sky’s the limit. Try different combinations until you find the ones you like best. And don’t forget to have fun with it – after all, that’s what homemade ice cream is all about! 🎉🍨
Solving Common Homemade Ice Cream Challenges
Making homemade ice cream is a delightful experience, but sometimes you might hit a few bumps along the way. Don’t worry! Here are some handy tips to help you overcome common challenges and ensure your ice cream turns out just right. 🍦✨
Preventing Ice Crystals in Your Ice Cream
Nobody likes icy ice cream. To keep your homemade ice cream smooth and creamy, follow these tips:
Chill Your Mixture: Before freezing, make sure your ice cream mixture is thoroughly chilled. This helps it freeze quickly, reducing the formation of ice crystals.
Stir Regularly: If you’re using the freeze and stir method, remember to stir your ice cream every 30 minutes during the freezing process. This breaks up any ice crystals that are starting to form.
Use an Airtight Container: When storing your ice cream, use an airtight container. This keeps out frost and prevents ice crystals from forming.
Ensuring Consistency in Flavor and Texture
For that perfect scoop of homemade ice cream, consistency is key. Here’s how to achieve it:
Measure Ingredients Carefully: Use exact measurements for your ingredients. This ensures a balanced flavor and the right texture.
Mix Well: Make sure you mix your ingredients thoroughly. This helps to dissolve sugar and evenly distribute flavors.
Taste as You Go: Feel free to taste your mixture before freezing. This way, you can adjust the sweetness or flavors as needed.
Remember that having fun and trying new things is what making ice cream at home is all about.Sometimes, it might not turn out perfect on your first try, and that’s totally okay! Each batch is a learning experience, and before you know it, you’ll be making amazing homemade ice cream like a pro! 🌟🍨
Serving and Storing Your Homemade Ice Cream
Congratulations! You’ve made your delicious homemade ice cream.Now, let’s talk about how to serve and store it so that you can get the most out of your tasty craft. 🎉🍨
Best Practices for Serving Ice Cream
Serving your homemade ice cream is almost as fun as making it! Here’s how to do it right:
- Ideal Serving Temperature: Let your ice cream sit at room temperature for a few minutes before serving. This makes it easier to scoop and enhances the flavor.
- Pairing with Toppings: Use different toppings! A sprinkle of chocolate sauce, fresh fruits, nuts, or chocolate chips can make it taste even better.
- Creative Presentations: Serve your ice cream in fun ways – in a cone, as part of a sundae, or alongside a slice of pie or cake. The possibilities are endless!
Long-term Storage Tips
To keep your homemade ice cream fresh and tasty, follow these storage tips:
- Use an Airtight Container: Keep your ice cream in a container that won’t let air in. This will keep it from getting freezer burn and any bad freezer smells out.
- Keep it Cold: Store your ice cream at the back of the freezer where it’s coldest. This helps maintain its texture and flavor.
- Press Plastic Wrap on the Surface: If you aren’t using a container that keeps air out, put a piece of plastic wrap on top of the ice cream before you cover it. To stop ice crystals from forming, do this.
By following these tips, you can enjoy your homemade ice cream to the fullest, savoring every scoop as if it was freshly made. So go ahead, indulge in your creamy, dreamy homemade creation – you’ve earned it! 🌟🍦
To Wrap Up
And there you have it – the complete scoop on making your own homemade ice cream! 🍦✨ We’ve gone over everything you need to do to make your kitchen an ice cream paradise, from picking out your favorite ingredients to mixing your treat and putting it in the freezer.
Remember, the beauty of homemade ice cream lies in the joy of creating something uniquely yours. Whether you stick to the classic flavors or venture into uncharted territories with experimental combinations, each batch is a reflection of your creativity and love for this sweet treat.
So, go ahead and share your homemade ice cream adventures with friends and family. Seeing their smiles as they taste your creation is the real cherry on top! And you never know, you might push someone else to start making their own ice cream.
Keep experimenting, keep enjoying, and most importantly, keep spreading the joy that comes with every scoop of your homemade ice cream. Happy churning! 🎉🍨