
Some links on this page are affiliate links. This means we may earn a commission at no additional cost to you if you click through and make a purchase, you can check our Affiliate Disclosure. Thank you for your support!
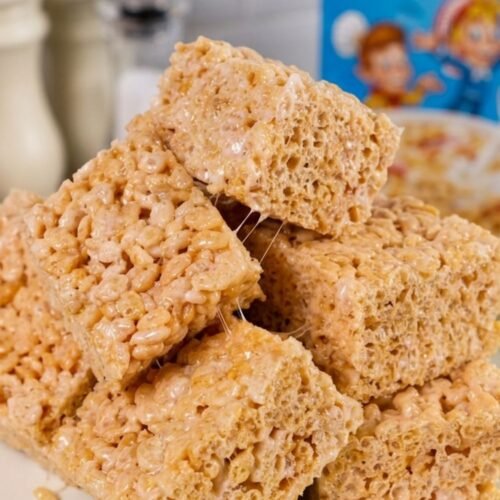
Rice Krispies Treats are one of those desserts that somehow disappear faster than anything else on the table.
They are soft, buttery, chewy, and packed with that crisp cereal texture everyone grew up loving. The best part is how incredibly easy they are to make. You only need a few ingredients, one saucepan, and about 10 minutes from start to finish.
But here’s the thing most people do not realize. The difference between average Rice Krispies treats and truly good homemade ones comes down to a few tiny details. Overheated marshmallows, pressing too hard, or rushing the mixing process can completely change the texture.
Let me show you how to make Rice Krispies treats that stay soft in the center, lightly chewy around the edges, and perfectly crisp without turning hard the next day.
These are the kind of homemade cereal bars that people keep sneaking pieces of straight from the pan.
Why This Recipe Works
Rice Krispies treats may seem almost too simple to fail, but technique matters more than people expect.
Melting the marshmallows slowly keeps the mixture smooth and creamy instead of stiff and rubbery.
Butter adds richness and balances the sweetness while helping the marshmallow mixture coat the cereal evenly.
One thing I learned quickly after making these multiple times is that pressing the mixture too firmly creates dense bars instead of soft chewy squares. A lighter touch makes a huge difference.
Keeping the cereal crisp while maintaining that soft gooey center is what makes homemade Rice Krispies treats so much better than packaged versions.
Ingredients
- 3 tablespoons butter
- 1 package marshmallows
- 6 cups Rice Krispies cereal

Step-by-Step Instructions
Step 1: Prepare the Pan
Line a square baking dish or pan with parchment paper or lightly grease it.
Parchment paper makes cleanup much easier and helps the treats lift out cleanly without sticking to the pan later.
Step 2: Melt the Butter
Place a large saucepan over low heat.
Add the butter and let it melt slowly.
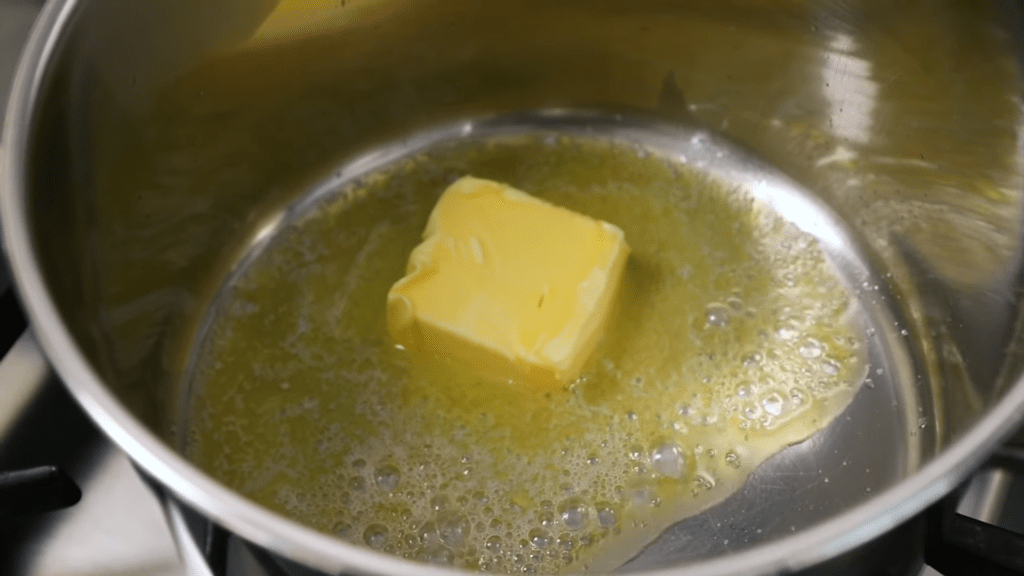
You do not want the butter browning here. Gentle heat keeps the flavor creamy and prevents the marshmallows from overheating too quickly.
Step 3: Melt the Marshmallows
Add the marshmallows to the melted butter.

Stir continuously until completely melted and smooth.
The mixture should look glossy, thick, and silky with no lumps remaining.
This step smells exactly like childhood kitchens and bake sale tables.

Step 4: Fold in the Cereal
Remove the saucepan from the heat.
Add the Rice Krispies cereal gradually while folding gently with a spatula.
Be careful not to crush the cereal too much while mixing. You want plenty of crisp texture throughout the bars.
The marshmallow mixture should lightly coat every piece without clumping heavily in one spot.

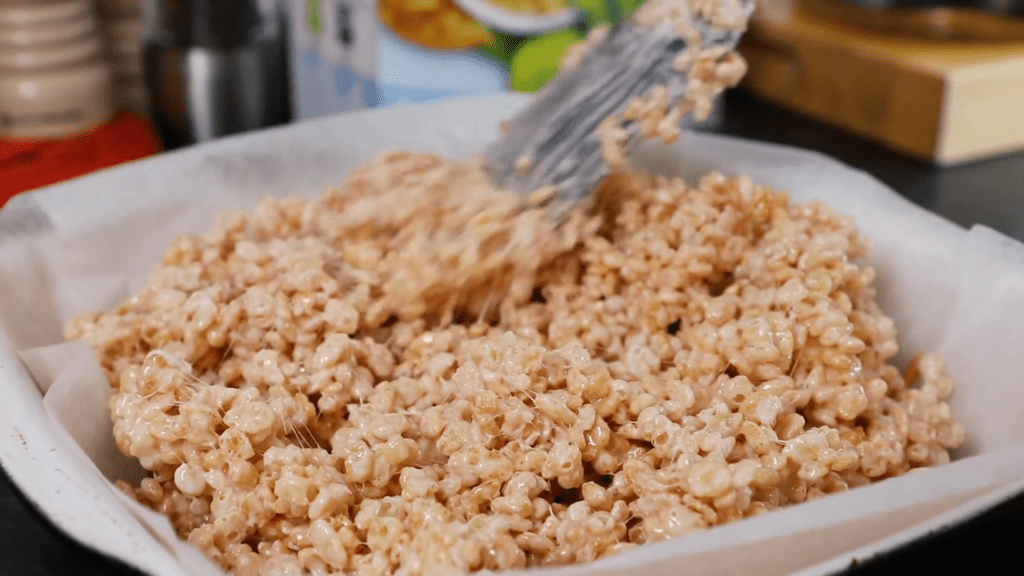
Step 5: Transfer to the Pan
Pour the mixture into the prepared pan.
Lightly press it into an even layer using a greased spatula or buttered hands.
One mistake people often make is packing the mixture down too tightly. That creates hard dense bars instead of soft chewy treats with light crisp texture.
Think gentle pressure, not compacting.
Step 6: Let the Treats Set
Allow the treats to cool at room temperature for about 30 minutes.
You can refrigerate them briefly if you want faster slicing, but room temperature gives the best chewy texture.

Step 7: Slice and Serve
Lift the treats out using the parchment paper.
Cut into squares or rectangles using a sharp knife.
For extra clean cuts, lightly butter the knife before slicing.
Serve fresh while the centers are still soft and gooey.

Tips for Best Results
- Melt marshmallows slowly over low heat
- Use fresh marshmallows for softer texture
- Stir gently to keep the cereal crisp
- Lightly grease your spatula before spreading
- Do not compress the mixture too firmly
One small trick that helps a lot is saving a handful of marshmallows to stir in at the very end. They partially melt and create little pockets of extra gooey texture throughout the treats.
Common Mistakes to Avoid
Overheating the Marshmallows
High heat can make the marshmallow mixture stiff, which leads to hard treats after cooling.
Pressing the Mixture Too Firmly
Dense packed cereal bars lose the soft airy texture that makes these treats so satisfying.
Crushing the Cereal
Aggressive stirring removes the crisp texture and can make the bars feel heavy.
Letting the Mixture Sit Too Long
Once the marshmallow mixture cools, it becomes harder to spread evenly.
Variations
Chocolate Rice Krispies Treats
Drizzle melted chocolate over the top or mix chocolate chips into the warm marshmallow mixture.
Peanut Butter Version
Stir peanut butter into the melted marshmallows for extra richness.
Birthday Cake Style
Add colorful sprinkles for a fun party version.
Cookies and Cream Treats
Mix crushed chocolate sandwich cookies into the cereal mixture.
Ingredient Substitutions
- Butter → Vegan butter or coconut oil
- Marshmallows → Vegan marshmallows
- Rice Krispies cereal → Gluten-free crispy rice cereal

What to Serve With Rice Krispies Treats
These treats pair perfectly with both snacks and desserts.
Here are a few simple serving ideas:
- Cold milk
- Hot chocolate
- Coffee
- Vanilla ice cream
- Fresh fruit
- Party dessert trays
They are especially great for lunchboxes, bake sales, birthdays, and casual movie-night snacks.
Storage Instructions
Store Rice Krispies treats in an airtight container at room temperature for up to 3 days.
Place parchment paper between layers if stacking to prevent sticking.
Reheating Instructions
These treats are best enjoyed at room temperature.
If you want them extra soft and gooey, microwave a square for about 5 seconds before eating.
Too much heat can make them overly sticky, so keep the warming brief.
Frequently Asked Questions
Why did my Rice Krispies treats turn hard?
This usually happens from overheating the marshmallows or packing the mixture too tightly into the pan.
Can I use mini marshmallows?
Yes. Mini marshmallows melt faster and work very well.
How do I keep Rice Krispies treats soft?
Store them in an airtight container and avoid overcooking the marshmallow mixture.
Can I freeze Rice Krispies treats?
Yes. Wrap individual squares tightly and freeze for up to 1 month.
Can I add mix-ins?
Absolutely. Chocolate chips, peanut butter, crushed cookies, and sprinkles all work well.
Are Rice Krispies treats gluten-free?
They can be if you use certified gluten-free crispy rice cereal.
Final Thoughts
Homemade Rice Krispies Treats are one of those simple desserts that almost everyone loves, but when made properly, they become much better than people expect.
The soft gooey center, buttery marshmallow flavor, and crisp cereal texture create something nostalgic, comforting, and surprisingly addictive.
What makes this recipe worth repeating is how quick and reliable it is. You can make a batch in minutes, customize them endlessly, and still end up with a dessert that feels homemade in the best possible way.
Once you taste them freshly sliced with that soft chewy texture still intact, it becomes very hard to settle for store-bought versions again.
Classic Rice Krispies Treats: The Easiest 3-Ingredient No-Bake Recipe!
Equipment
- Medium saucepan
- Spatula or knife
- Oven dish lined with greaseproof or parchment paper
Ingredients
- 45 g butter
- 250 g marshmallows
- 165 g Rice Krispies cereal
Instructions
- Melt the Butter:In a medium saucepan, melt the butter over low heat on the stove.
- Add the Marshmallows:Once the butter is melted, add the 250g of marshmallows to the saucepan. Stir continuously until the marshmallows have fully melted and the mixture is smooth and gooey.
- Stir in the Rice Krispies:Keeping the pan over low heat, gently fold in the 165g of Rice Krispies cereal. Stir until the cereal is fully coated with the marshmallow mixture.
- Transfer to a Dish:Remove the pan from heat. Pour the marshmallow-coated Rice Krispies into a dish lined with greaseproof or parchment paper.
- Level the Mixture:Use a spatula or the back of a knife to evenly spread and compact the Rice Krispies mixture in the dish until the top is flat.
- Set the Treats:Let the Rice Krispies treats set. You can either place them in the fridge to chill or leave them in a cool, covered place until firm.
- Cut into Squares:Once the treats have set, peel back the parchment paper and cut the giant Rice Krispies square into 12 smaller squares.
Notes
- Feel free to get creative by adding extra ingredients like chocolate chips, sprinkles, or a drizzle of melted chocolate on top for added flavor and fun.
- Store any leftover Rice Krispies treats in an airtight container for up to 3 days.